Tuesday, December 11, 2012

Y-axis servo arrives! Damaged!

Mid-August 2012:

Did some digging on eBay to find myself a servo that is comparable to what is already installed on the mill, my primary concerns being torque and voltage. Like the Z and X servos I intend to drive the ballscrew directly (as in, no mechanical reduction). Be aware that if you go servo shopping on eBay there is an OVERWHELMING number and variety of servos on there. My first inclination was to find something approximately the same size as what is already on the mill, but I have since been told (warned?) that improvements in servo tech over the last 33 years since this mill was made have reduced the size and increased the torque of many of these motors, even in the same "style" as what I have on my mill (2- and 4- brush, brushed permanent magnet DC).

So I found this gem for $149 + $13 SH, says it will work in my voltage range (anticipating 70-80 volts, since the power supply is still not assembled yet), has encoder, 1500 oz-in of peak torque and I'm sold. Buy now, enter paypal password, eagerly await tracking number.

Then it shows up :(

DSCF1136

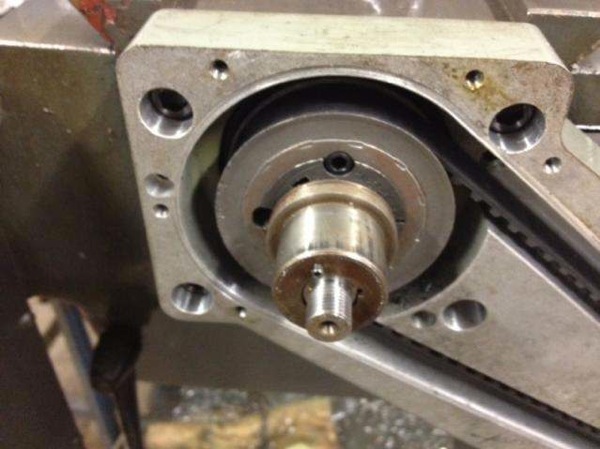
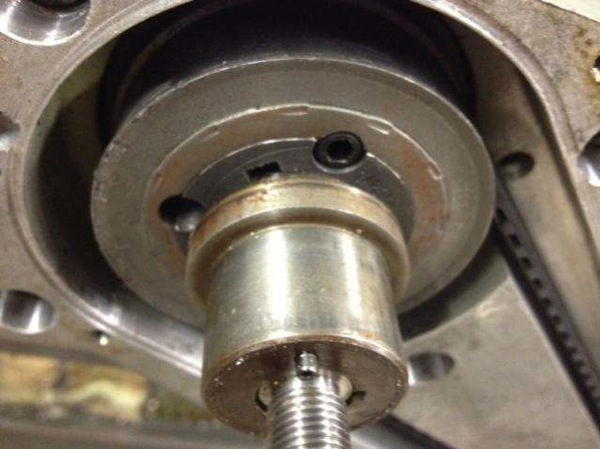
As you can see, the end of the pin that holds the encoder wheel on is smashed from poor packaging, the pin itself is bent and encoder pins are all bent up. Another view:

DSCF1138

I grumbled to the seller and got $25 back on it, hoping to repair the shaft and straighten the encoder pins and see what happens. I didn't take any photos of the shaft repair, but the encoder drive pin is actually just a piece of 3/16" round solid that was (poorly) machined down to 1/8" to fit the wheel center collet. I expected it to be pressed into the motor, but it was only glued in with some cheap epoxy. I applied some heat to the end of the pin and was able to pull it out with a pair of vice grips to take measurements and make a new one on the lathe, glue in place and reattach the encoder. Minor setback (hopefully) averted. We'll find out for sure when we attach a drive to that encoder.
Sunday, December 2, 2012

Y-axis servo mount

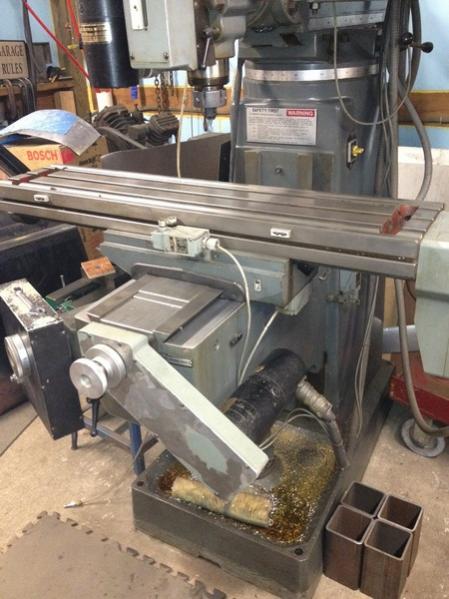
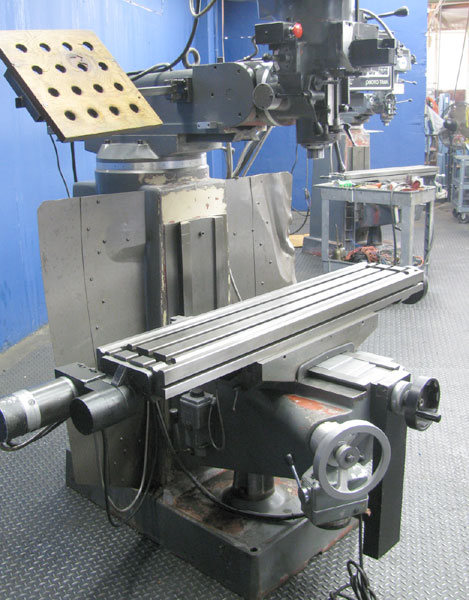
When I purchased the mill the Y-axis servo mount was all but missing. Someone had installed some sort of manual bearing mount that left the bearings unprotected and their handle setup didn't put the proper amount of pre-load on the bearings to keep the screw from shifting and throwing off the dial reading. Some requests on the practical machinist forums got me these pics of how the servo was mounted on other Lagun mills:

Lagun example brackets

And another:

Mf19za

And an up close shot of a third:

Photo  1

Photo  2

I went searching on eBay and turned up a pair of servo mounts that looked about right from a Precision Matthews brand knee mill.

$ KGrHqJHJEEE njyti9OBPsfm c U ~~60 57

$ KGrHqRHJEME m1WUt54BPsfm9nkf ~~60 57

These were a bit spendy ($325) but at least I was able to recoup some of it by selling the X-axis bracket I didn't need. Some grinding on one of the bolt holes and a few longer bolts and I was able to fit the Y-axis bracket to my mill:

DSCF1074

DSCF1102

Spindle ballscrew bearings and encoder mount

Late July 2012

Since almost every other bearing was in lousy shape I decided to pull the ballscrew bearings out of the head and replace them, and did some cleaning up while I was in there too.

View of the bottom bearing cap, before:

DSCF1071

Pulled ballscrew out, decided to turn top end for a HEDS style encoder since 1/8" is a common (read: cheaper and more available) size for encoders. Shown here: a blurry photo of me indicating the screw to make sure I'm centered up on the lathe:

DSCF1063

A much better image:

DSCF1064

Shaft turned down:

DSCF1070

Success! Encoder fits snugly!

DSCF1069

After shot of ballscrew cap and bearing with some much-needed cleaning:

DSCF1072

Reassembled:

DSCF1073

Boring updates and electrical work

June-July 2012

Maybe not the most glorious of updates, but I bought a hold down set from eBay and also dug up an automatic bijur luber that I had intended to use on an earlier mill. Both of these got mounted to the side of the mill.

DSCF1099

Got the head fully reassembled with new bearings in the motor

DSCF1104

Took apart the motor control button so I could make a diagram with wire codes

DSCF1105

Another view:

DSCF1106

Took off a bunch of old and cut wiring to get down to the minimum necessary to make the head run in forward and reverse

DSCF1110

Labeling some wires in preparation:

DSCF1111

Close up of rewired panel:

DSCF1112

As Red Green would say, this is only temporary… unless it works.

DSCF1113

Test bench set up. In the future there will be conduit for all wires and strain relief for the thick black power cord.

DSCF1115

Doing all this wiring, I now have forward and reverse buttons working as well as a stop button for the spindle.

Varispeed Head Pt II

Around May 2012 While I bought many of the bearings from eBay and elsewhere, I purchased a new set of glacier sleeves and guides as well as a parts breakdown and manual from Carmen at Republic-Lagun HQ in Harbor City, California. Carmen is a good guy and has a lot of experience with old machines like mine.

I'm going to try to add dates to all entries from here on out so that other DIY'ers and experimenters can see about how long its taking me to get this project from basket case to functional again. Although I started this blog a couple weeks ago, I traded an automatic nonferrous saw for the mill + $300 cash in early March 2012. I started the rebuild with some seed money from the sale of my Amstar-Foxcon HVI 1/2 manual mill in April.

DSCF1040

Added cleaned up sheaves to the back gear section of the varispeed head.

DSCF1083

Started bolting pieces back together on the mill - this shows the back gear on the spindle head. It seemed like a much easier way to reassemble than reassembling the head then trying to lift that whole heavy assembly onto the splined driveshaft of the spindle.

DSCF1084

Top belt cover on.

DSCF1086

Side view

DSCF1087

Chain and sheave movement assay in place on the front of the belt cover.

DSCF1090

Spun motor shaft as I was getting excited about putting everything back together and realized I needed motor bearings too (face palm). So I pulled the motor apart, got bearing numbers to order more(6205Z x2) and went home with my pride hurt.

DSCF1100

Motor-side sheave assembly.

Friday, November 23, 2012

Varispeed Head Rebuild

The VS head was removed from the mill when I picked it up, and included in a wooden crate alongside it. First step was removing the motor:

DSCF0994

After removing the motor, I pulled the upper housing apart to get bearing numbers and pull all the VS sheaves apart.


Here's a few of them for any other Lagun rebuilders out there:
ballscrew end bearings SKF 7204B (x6)
Suspended sheave NTN 6012 LB
Thrust cap bearing 6007LB
bottom sheave brg 6009LB
bottom backgear bearing 6008LB (x2)
top backgear bearing 6004LB (x2)
Motor bearings 6205Z (x2)

Many of these can be sourced direct from the bearing manufacturer, eBay or elsewhere for cheaper than the OEM who is just acting as a middleman anyways.

DSCF0995DSCF0996

Using my recently-purchased bigger lathe, I cleaned up all the sheaves. The outside of the suspended sheave was beat up by a bearing race spinning on it, so I had to add material with the tig welder and turn it down, then bore the inside to make it round again for the glacier sleeve. Given the cost of new sheaves, this job justified all the tooling and accessories I've recently bought for the lathe.

DSCF0997DSCF0998

Split the bottom back gear assembly apart, well greased but filthy. More cleaning…

DSCF1018DSCF1019DSCF1020DSCF1021DSCF1022DSCF1023DSCF1024DSCF1025DSCF1039

Cleanup Effort

DSCF0977

Removed the X-axis bracket, and surprise, its filthy.

DSCF0979

Y-axis way, before shot.

DSCF0978DSCF0981

Y-axis ways, after a lot of carb cleaner and shop rags. You can still see the scraping marks, so I hope that means my gamble paid off - in spite of some rust and grime it looks like this mill got lots of lubrication while it was in service.

DSCF0980

Table after going over twice with a razor-blade scraper, twice with carb cleaner and shop rags, then painting up good with some Chevron Vistac #68 way lube.

DSCF0983DSCF0985DSCF0986

Resolver/Tach drive setup with cover removed

DSCF0988DSCF0989DSCF0990

Lifting the knee up as high as I can to clean the bottom of the Z-axis ways and mill base as best I can

DSCF0992 DSCF0993

Cleaning out the sump. It was disgusting and nasty and took about 4 hours to get reasonably clean. I gave up on trying to get nasties and chips to overflow, since the mill was lifted up on the wheeled base I drilled a hole in the bottom of the sump, drained all the oil out, then simple green'ed and pressure washed the inside of the sump, and plugged the hole with a rubber compression/expansion plug.